

Prep Time: 10 minutes | Cook Time: 25 minutes | Fermentation Time: 10–12 hours | Total Time: ~12 hours | Serves: 20 pieces | Difficulty: Beginner-Friendly
There are certain bakes that make your entire kitchen smell like a dream — and this honey butter sourdough focaccia bread is absolutely one of them.
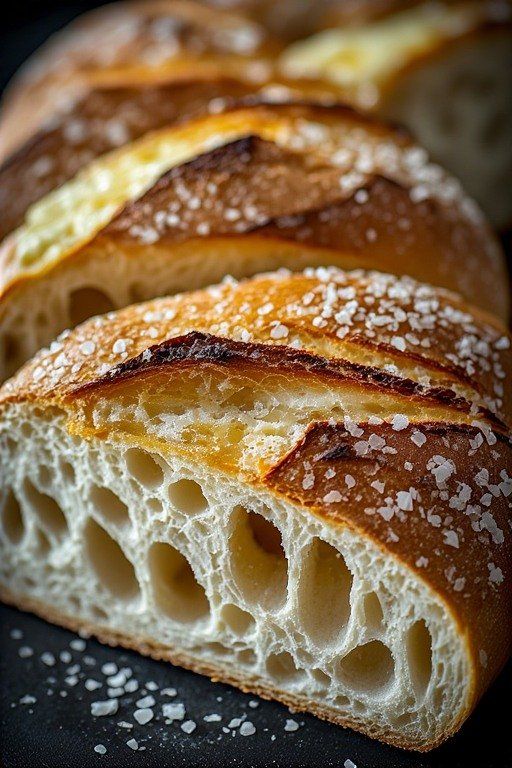
Golden on the bottom. Pillowy and airy inside. Glazed with a warm honey butter that soaks into every single dimple and crevice. Finished with a scatter of flaky sea salt that makes the sweetness sing.
This is the bread that disappears within an hour of coming out of the oven. The bread that makes people hover near the kitchen waiting. The bread that looks impressive, tastes extraordinary, and is — honestly — one of the most forgiving things you can bake with sourdough.
If you have been nervous about sourdough baking, this is where you start. No Dutch oven. No complicated shaping. No scoring. Just a handful of simple ingredients, an overnight rest, and a hot oven. That’s it.
Let’s make it.
Why This Recipe Works So Well
Before anything else, let’s talk about what makes this particular focaccia special — because there are a lot of focaccia recipes out there, and this one earns its place.
The honey is baked IN and drizzled ON. Most recipes do one or the other. Here, honey goes into the dough for sweetness from within, is poured over before baking so it caramelizes in the oven, and then gets drizzled again the moment the bread comes out. Three layers of honey flavor in every bite.
The high hydration dough creates extraordinary texture. This recipe runs at nearly 100% hydration — roughly equal parts flour and water by weight. That sounds alarming if you’re used to stiffer doughs, but it’s exactly what creates those magnificent air pockets that fill with honey butter when you pour it over. Embrace the sticky.
The overnight bulk ferment does all the work. Mix it in the evening. Sleep. Come back to a dough that has doubled or quadrupled in size, developed deep sourdough flavor, and is ready to go into the pan. The time investment is almost entirely hands-off.
The flaky sea salt at the end is not optional. Sweet plus salty is one of the most powerful flavor combinations in baking. The salt on top of the honey butter glaze is what takes this bread from very good to completely addictive.
What Is Sourdough Focaccia? (And Why Is It Different from Regular Focaccia?)
Focaccia is an Italian flatbread baked in a sheet pan with a thick, dimpled surface and a crispy bottom — traditionally flavored with olive oil and sea salt. It is one of the most beginner-friendly breads you can make because it requires no shaping, no scoring, and no specialized equipment.
Sourdough focaccia uses a naturally fermented sourdough starter instead of commercial yeast. This longer, slower fermentation process does three significant things:
It develops a far more complex, tangy flavor that commercial yeast simply cannot replicate. It creates a more open, irregular crumb structure with larger air pockets. And it produces bread with genuinely better gut health benefits, as the long fermentation process breaks down phytic acid and makes the bread easier to digest.
The trade-off is time — sourdough focaccia takes 10 to 12 hours rather than 2. But because the vast majority of that time is completely hands-off, it fits beautifully into an overnight schedule. Mix before bed, bake in the morning.

Ingredients You’ll Need
For the Dough
- 3.5 oz (100g) active sourdough starter — bubbly, fed within 4 to 8 hours, at its peak activity
- 1½ cups plus 3 tablespoons water (400g) — room temperature, no need to warm it
- 3 tablespoons honey — raw honey preferred for best flavor; this goes into the dough itself
- 2 teaspoons fine sea salt
- 4 cups (480g) bread flour — bread flour gives a chewier, more structured crumb; all-purpose works but gives a slightly softer result
- 2 to 3 tablespoons extra virgin olive oil — for greasing the bowl during fermentation
- 3 tablespoons extra virgin olive oil — for the baking pan
For the Honey Butter Glaze
- 5 tablespoons unsalted butter, melted
- 5 tablespoons honey — the good stuff here, it’s the star topping
To Finish
- Flaky sea salt — Maldon or Fleur de Sel preferred; the flakes matter here, not fine salt
Ingredient Notes
On the sourdough starter: Your starter must be active, bubbly, and at or near its peak when you use it. If it smells alcoholic, looks flat, or has not been fed recently, feed it first and wait until it is visibly active before mixing your dough. An inactive starter means a flat, dense focaccia.
On bread flour vs all-purpose flour: Bread flour has a higher protein content (around 12 to 13%) which develops stronger gluten and gives the focaccia its signature chew and ability to hold those beautiful air bubbles. All-purpose flour works in a pinch but produces a slightly softer, less structured crumb. If you substitute all-purpose flour, reduce the water by about 20 grams as it absorbs less liquid.
On the olive oil: This is not the place for a neutral vegetable oil. Extra virgin olive oil contributes to the flavor of the bread in a meaningful way. A good quality olive oil — not necessarily expensive, but genuinely good — makes a difference you will taste.
On the honey: Use whatever honey you love eating. Wildflower, clover, raw, local — all work beautifully. The flavor of the honey does come through in the finished bread, so a honey you enjoy on its own will produce a bread you adore.
Equipment You’ll Need
- Large glass or plastic mixing bowl (not metal — metal can react with the sourdough starter)
- Digital kitchen scale (highly recommended for accuracy with sourdough)
- Danish dough whisk or wooden spoon
- 9 x 13 inch baking pan — not a loaf pan, not a Dutch oven
- Small saucepan or microwave-safe bowl for melting the butter
- Pastry brush (optional but helpful for spreading the honey butter)
- Plastic wrap or a damp kitchen towel for covering the dough
Baking Schedule Options
One of the most common questions about sourdough baking is: when do I actually have time to do this? Here are two schedules that fit real life.
Schedule A — Mix in the Evening, Bake in the Morning (Recommended)
| Time | Action |
|---|---|
| 8:00 PM | Mix the dough, perform stretch and fold |
| 8:30 PM | First stretch and fold |
| 9:00 PM | Second stretch and fold (optional) |
| 9:30 PM | Cover and leave to bulk ferment overnight at room temperature |
| 7:00 AM | Transfer dough to oiled pan, shape gently |
| 8:00–9:00 AM | Second rise in the pan (1–2 hours) |
| 9:30 AM | Dimple, pour honey butter, bake |
| 10:00 AM | Fresh focaccia for breakfast |
Schedule B — Mix in the Morning, Bake in the Evening
| Time | Action |
|---|---|
| 7:00 AM | Mix dough, perform stretch and fold |
| 7:30–8:30 AM | Stretch and fold every 30 minutes (2 to 3 times) |
| 9:00 AM | Transfer to refrigerator for slow bulk ferment |
| 4:00 PM | Remove from fridge, transfer to oiled pan |
| 5:00–6:00 PM | Second rise in the pan |
| 6:30 PM | Dimple, pour honey butter, bake |
| 7:00 PM | Fresh focaccia for dinner |
Temperature note: The speed of your bulk ferment depends entirely on the temperature of your kitchen. A warm kitchen (75–80°F / 24–27°C) will ferment much faster than a cool one (65–68°F / 18–20°C). Watch your dough, not just the clock. You want it to at least double in size — and it may triple or quadruple with a very active starter and warm environment.
Step-by-Step Instructions
Step 1 — Mix the Dough
In your large glass or plastic mixing bowl, combine the sourdough starter and room temperature water. Stir them together with a fork or dough whisk until the starter is fully dissolved and the mixture looks milky.
Add the honey, fine sea salt, and bread flour. Mix until everything is fully combined and no dry flour remains. At first, use a Danish dough whisk or wooden spoon. As the dough comes together, switch to your hands — this is the most effective tool at this stage. The dough will be wet, shaggy, and sticky. This is exactly correct. Do not add more flour.
Cover the bowl with plastic wrap or a damp kitchen towel. Let the dough rest for 30 minutes. This resting period — called the autolyse — allows the flour to fully hydrate and begins gluten development without any effort on your part.
Why no warm water? Sourdough fermentation is driven by the wild yeast already living in your starter. Unlike commercial yeast, it does not need to be “activated” with warm water. Room temperature water works perfectly and gives you more control over the speed of fermentation.
Step 2 — Stretch and Fold
After the 30-minute rest, it’s time to develop the gluten through stretch and fold — a technique that replaces traditional kneading for high-hydration doughs.
Wet your hands thoroughly with cold water — this prevents the dough from sticking to your fingers. Reach under one side of the dough, lift it as high as it will stretch without tearing, and fold it over the top of the dough. Rotate the bowl 90 degrees and repeat on all four sides. This is one complete set.
Cover and rest for 30 minutes. Repeat this process two to three more times over the course of the evening if you have time. Each set of stretch and folds strengthens the gluten network and improves the final texture. If you only have time for one set, that is perfectly fine — the long overnight ferment does significant work on its own.
The key to stretch and fold: Always wet your hands before touching the dough. Dry hands create friction that tears the dough and sticks unpleasantly. Cold water keeps the dough from warming up too fast and keeps your hands clean throughout.
Step 3 — Bulk Ferment Overnight
After your final stretch and fold, cover the bowl securely with plastic wrap. Press the wrap directly against the surface of the dough to prevent a dry skin from forming.
Leave the bowl at room temperature on your kitchen counter overnight to bulk ferment. This long, slow rise is where the magic happens — it is what gives this bread its extraordinary flavor, its complex tang, and its open, airy crumb structure.
In the morning, you should see a dough that has at minimum doubled in size. A very active starter in a warm kitchen may produce a dough that has tripled or even quadrupled. This is not a problem — it’s a sign of a healthy, vigorous starter. Large bubbles visible through the sides of a glass bowl are a sign of excellent fermentation.
If you want to bake in the evening instead: After your stretch and fold session, transfer the covered dough to the refrigerator. The cold slows fermentation dramatically. Remove it from the fridge 2 hours before you plan to transfer it to the pan, to allow it to come back to room temperature.
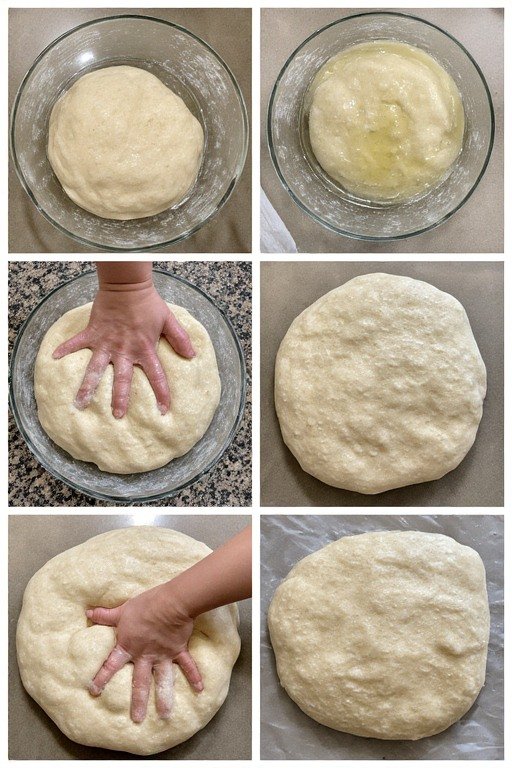
Step 4 — Transfer to the Baking Pan
Pour 2 to 3 tablespoons of extra virgin olive oil into your 9 x 13 inch baking pan. Tilt and swirl the pan to coat the bottom and sides completely. A well-oiled pan is essential for the crispy bottom crust that makes focaccia so distinctive.
Now, the most important moment of the entire process: do not deflate the dough.
Wet your hands and use them to gently release the dough from the sides of the bowl. Tilt the bowl over the center of the oiled pan and let gravity do most of the work — the dough should drop out slowly onto the pan in a soft, wobbly mass. Do not punch it, press it, or force it out. Every large bubble you see is a pocket of CO2 produced by your wild yeast over 10 hours of fermentation. Preserve them.
Gently use your fingertips to encourage the dough to spread slightly toward the corners — don’t force it. The dough will resist at first and that is completely normal. It will relax and spread fully during the second rise.
Step 5 — Second Rise in the Pan
Cover the pan with a clean kitchen towel and place it in a warm spot in your kitchen. Let the dough rise again until it has roughly doubled in size within the pan — this takes approximately 1 to 2 hours depending on the temperature of your space and the activity of your starter.
The dough is ready for the oven when it looks puffy and bubbly, fills the pan generously, and jiggles slightly when you shake the pan gently. If you press it lightly with a wet finger, it should spring back slowly.
Preheat your oven to 425°F (220°C) during this second rise. A fully preheated oven is crucial — the sudden blast of heat is what creates the signature crispy, golden bottom crust and causes the top to bloom beautifully.
Step 6 — Make the Honey Butter Glaze
While the dough is completing its second rise, melt the butter in a small saucepan over low heat or in the microwave in 30-second intervals. Add the honey to the melted butter and stir until fully combined and smooth.
The glaze should be liquid and pourable. If it starts to cool and thicken before you use it, warm it briefly again. You want it fluid enough to flow into the dimples you’re about to create.
Step 7 — Dimple and Glaze
Once the dough has completed its second rise and your oven is fully preheated, it’s time for the most satisfying step in the whole recipe.
Pour approximately two-thirds of the honey butter glaze evenly over the surface of the risen dough. Use your hands to spread it gently across the entire top.
Now dimple the dough. Press your fingers firmly straight down into the dough across the entire surface, creating deep wells and craters. The honey butter will rush into these dimples — this is exactly what you want. The dimples are not just decorative. They give the honey butter somewhere to pool and caramelize, creating those intensely flavorful pockets in the finished bread.
The critical rule about bubbles: When you dimple, you will feel the urge to press hard and flatten everything. Resist this. Press firmly but not aggressively. Large bubbles visible in the dough are not problems — they are gifts. Preserve as many as you can. Those bubbles become the air pockets that give the baked focaccia its incredible lightness.
Step 8 — Bake
Slide the pan onto the middle shelf of your fully preheated 425°F (220°C) oven. Bake for 20 to 25 minutes.
You are looking for a deep, golden-brown top — not pale yellow, not lightly golden, but genuinely amber and caramelized. The honey in the glaze will darken the surface more than a plain olive oil focaccia would, so don’t be alarmed when you see the color developing. That caramelization is flavor.
The bottom should be crispy and golden when you lift the edge slightly with a spatula. If the top is browning but the bottom still looks pale, move the pan to a lower rack for the final 5 minutes.
Step 9 — Final Honey Butter Drizzle and Finishing
The moment the pan comes out of the oven, immediately pour the remaining one-third of the honey butter glaze over the hot surface of the bread. Use a pastry brush to spread it evenly if you have one — if not, tilt the pan gently to encourage the glaze to flow across the entire top.
The residual heat of the bread will absorb the butter and pull the honey deep into the surface. This double application of honey butter is what makes this focaccia so extraordinarily rich — the first layer caramelizes in the oven, the second layer soaks in fresh and bright.
While the honey butter is still wet and warm, sprinkle flaky sea salt generously across the entire surface. Be slightly more generous than you think is right. The contrast between the sweet honey butter and the crunchy salt flakes is the defining characteristic of this bread.
Let the focaccia cool in the pan for 10 minutes before cutting. This resting time allows the interior crumb to set properly.
How to Serve Honey Butter Sourdough Focaccia
This bread is extraordinary in multiple contexts:
Warm from the oven: The classic and best experience. Tear it into squares at the table and let people help themselves. The steam, the honey butter, the salt — it needs nothing else.
As a breakfast bread: Lightly toasted the next morning, it becomes something entirely different — caramelized edges, concentrated honey flavor, almost like a pastry. Serve with strong coffee.
With cheese: A wedge of aged cheddar or creamy brie alongside a square of this focaccia is a genuinely brilliant combination. The sweet-savory interplay is outstanding.
As a dessert bread: Serve slightly warm with a scoop of vanilla ice cream and an extra drizzle of warm honey. Unexpected and genuinely wonderful.
As an afternoon snack: Straight from the bag, at room temperature, exactly as it is. This is how children will eat it and they will ask for more within minutes.

Frequently Asked Questions
Can I make this recipe without a sourdough starter? Yes, but it won’t be sourdough focaccia — it will be regular focaccia. Replace the sourdough starter with 1 teaspoon of instant yeast dissolved in the water. Reduce the total rise time to 2 to 3 hours at room temperature. The flavor will be noticeably different — milder, less complex, without that characteristic tang — but the texture and honey butter glaze will still be wonderful.
How do I know if my sourdough starter is active enough to bake with? The float test: drop a small spoonful of starter into a glass of room temperature water. If it floats, it’s active with enough gas. If it sinks, it needs more time or another feeding. The most reliable sign, however, is visual — an active starter should have at least doubled in size since its last feeding, be covered in bubbles, and smell pleasantly sour.
Can I use whole wheat flour? Yes, with adjustments. Whole wheat flour absorbs more water and produces a denser, nuttier focaccia. Start by replacing 10 to 15% of the bread flour with whole wheat flour and add an extra tablespoon or two of water to compensate for the increased absorption.
Why does the recipe specify a glass or plastic bowl and not metal? Metal can react with the acidity of the sourdough starter in prolonged contact — particularly over the 10 to 12 hour bulk ferment. Glass or plastic are inert and do not affect the fermentation or flavor of the dough.
My honey butter separated — what happened? This happens when the butter is too hot when you add the honey, or when the mixture cools and re-separates. If it separates, simply whisk it briskly until it comes back together. Warming it gently also helps re-emulsify it.
Can I double this recipe? Absolutely. Double all ingredients and use either a large half-sheet baking pan or two 9 x 13 pans. The baking time remains the same, though a thicker focaccia may need an extra 3 to 5 minutes.
How do I know when the focaccia is fully baked? The top should be a deep, rich golden-amber color — significantly darker than a plain focaccia would be, due to the honey caramelizing. The bottom should be golden and crispy when you lift the edge with a spatula. An internal temperature of 190 to 200°F (88 to 93°C) on an instant-read thermometer confirms it is fully baked through.
Nutritional Information (Per Piece, Approximate — Makes 20 Pieces)
| Nutrient | Amount |
|---|---|
| Calories | 165 kcal |
| Carbohydrates | 26g |
| Protein | 3.5g |
| Fat | 6g |
| Saturated Fat | 2.5g |
| Sodium | 280mg |
| Sugar | 8g |
| Fiber | 1g |
Values are estimates and will vary based on specific ingredient brands and portion sizes.
The Bottom Line
Honey butter sourdough focaccia bread is the kind of bake that changes how people think about bread. It proves that sourdough doesn’t have to be intimidating, that focaccia doesn’t have to be just an afterthought, and that sweet and savory together are almost always better than either one alone.
The process is simple. The ingredients are few. The result is extraordinary.
Mix it tonight. Bake it tomorrow. And watch how quickly a single 9 x 13 pan disappears.
Made this recipe? Leave a star rating and tell us how it turned out in the comments below. Did you try any of the variations? We’d love to hear which one became your favorite!