Published: May 2025 | Difficulty: Beginner to Intermediate | Perfect For: Parties, Brunch, Kids, Content Creation
There’s a certain kind of magic that happens when food stops being just food — and becomes an experience.
When a plate makes someone stop mid-conversation, pull out their phone, and say wait, did you actually make that? — that’s whimsical food doing exactly what it’s supposed to do.
Whimsical food isn’t about being complicated. It’s about being intentional with color, shape, and creativity. It’s the difference between a bowl of fruit and a fruit bowl that looks like a blooming garden. Between a birthday cake and a cake that makes the whole room gasp.
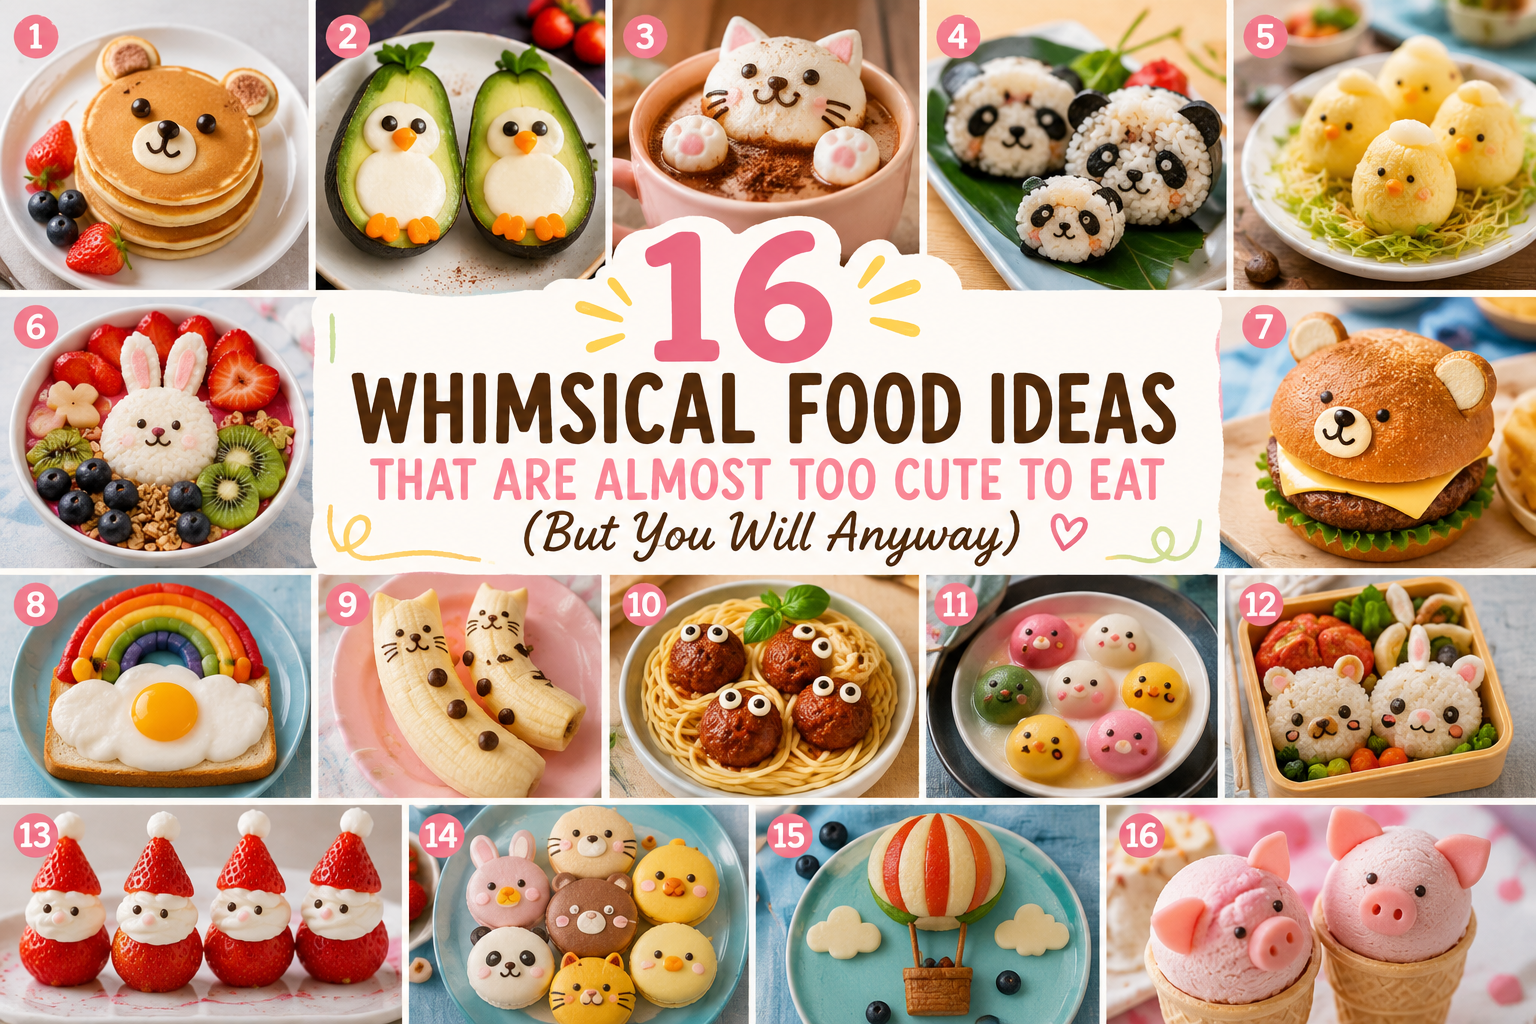
Whether you’re cooking for kids, throwing a themed party, building your food blog, or just want to make Tuesday feel extraordinary — these 18 whimsical food ideas will bring genuine magic to your kitchen.
What Exactly Is Whimsical Food?
Whimsical food is any dish where imagination is treated as an ingredient. It’s food that tells a story, creates a mood, or transforms a simple recipe into something that looks like it came from a fairytale kitchen.
It’s the rainbow swirl in a cheesecake. The edible flower pressed into a butter pat. The cloud-shaped meringue floating in a bowl of blue butterfly pea flower lemonade.
The best part? Most whimsical food ideas are far simpler than they look. The impact comes from presentation and color — not from hours of technical cooking.
Quick Navigation
Galaxy Swirl Pancakes
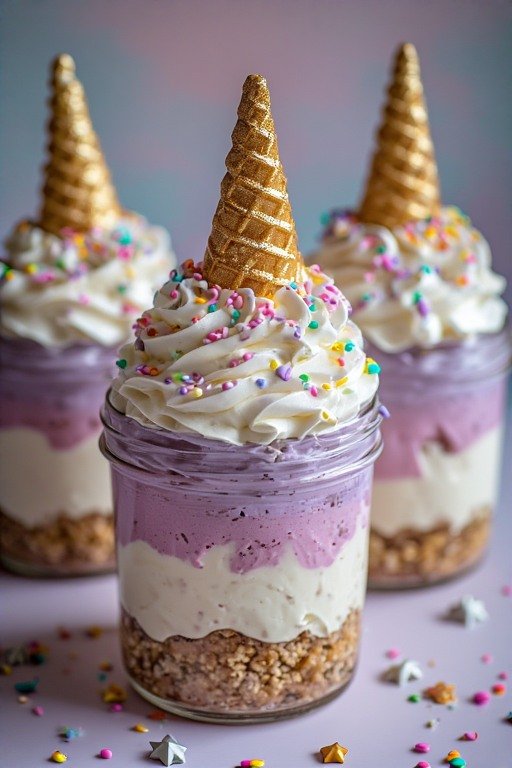
Unicorn Cheesecake Jars
Butterfly Pea Flower Lemonade
Teddy Bear Toast (Beginner Friendly)
Edible Flower Ice Cubes
Rainbow Fruit Skewers with Honey Yogurt Dip
Cloud Eggs (Viral, Easy, Gorgeous)
Mermaid Smoothie Bowl
Mushroom Forest Pasta
Sushi Donuts
Fizzy Strawberry Truffles
Ladybug Caprese Bites
Watercolor Buttercream Cupcakes
Starry Night Gelatin Dessert
Hedgehog Bread Rolls
Fairy Garden Charcuterie Board
Cotton Candy Milkshakes
Enchanted Forest Salad Bowl
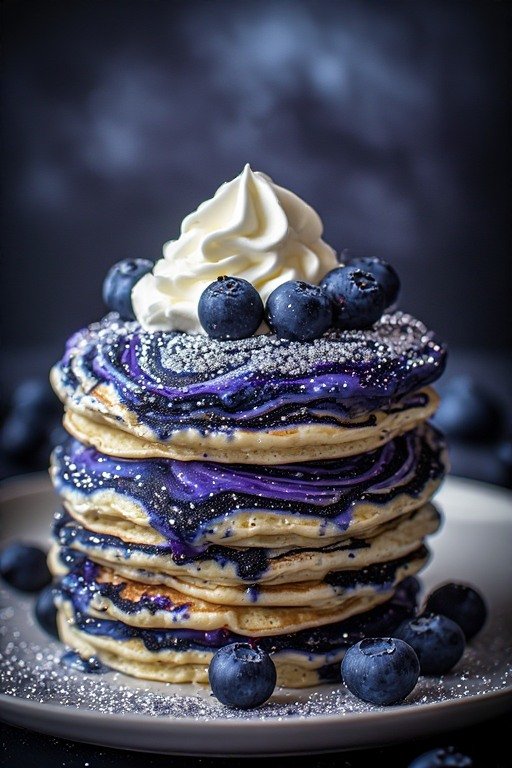
1. Galaxy Swirl Pancakes
Whimsy Level: ⭐⭐⭐ | Time: 20 minutes | Perfect For: Weekend brunch, kids’ breakfast, social media
These are the pancakes that make people do a double-take. Swirls of deep purple, electric blue, and midnight black create a galaxy effect that looks like it was painted by hand — and the secret is just food coloring and a toothpick.
Ingredients
1.5 cups all-purpose flour
2 teaspoons baking powder
1 tablespoon sugar
Pinch of salt
1 egg
1 cup milk
2 tablespoons melted butter
Purple, blue, and black gel food coloring
Edible silver glitter (optional but worth it)
Whipped cream and fresh blueberries to serve
How to Make It
Whisk together flour, baking powder, sugar, and salt in a large bowl. In a separate bowl, beat the egg, milk, and melted butter. Combine the wet and dry ingredients until just mixed — small lumps are fine, don’t overmix.
Divide the batter equally into three small bowls. Color one bowl deep purple, one electric blue, and one black or very dark navy. The gel food coloring gives the most vivid result — liquid coloring makes the batter too thin.
Heat a non-stick pan over medium-low. Spoon small dollops of each color side by side in the pan, close together. Before they set, drag a toothpick through the colors in a swirling motion to create the galaxy effect.
Cook until bubbles form on the surface and the edges look set, then flip gently once and cook 1 more minute.
Serve stacked, dusted with edible silver glitter, with whipped cream and blueberries.
Pro Tip: Take the photo before you pour the syrup. Galaxy pancakes photograph best dry, with a dusting of glitter — the syrup flattens the visual effect instantly.
No-bake, no oven, and genuinely stunning. These individual cheesecake jars with swirls of pink, lavender, and gold are the dessert everyone photographs before they eat — and then immediately asks for seconds.
Ingredients
For the crust:
1 cup graham crackers or digestive biscuits, crushed
3 tablespoons melted butter
1 tablespoon sugar
For the cheesecake filling:
250g cream cheese, softened to room temperature
½ cup powdered sugar
1 teaspoon vanilla extract
1 cup heavy whipping cream, whipped to stiff peaks
Pink, lavender, and yellow gel food coloring
To decorate:
Whipped cream
Mini waffle cones (for unicorn horns)
Gold edible dust or luster spray
Rainbow sprinkles
Edible silver stars
How to Make It
Make the crust: Mix the crushed biscuits with melted butter and sugar until the mixture resembles wet sand. Spoon 2 to 3 tablespoons into the bottom of each jar and press firmly. Set in the refrigerator while you make the filling.
Make the filling: Beat the cream cheese, powdered sugar, and vanilla until smooth and fluffy. Fold in the whipped cream gently with a spatula — fold, don’t stir, to keep the airiness.
Divide the filling into three portions and color one pink, one lavender, and leave one white or tint it pale gold.
Assemble: Drop spoonfuls of each color alternately into each jar. Use a skewer to swirl them together gently just once or twice — you want visible swirls, not a blended color.
Chill for at least 2 hours until set.
Decorate: Top with a swirl of whipped cream. Dust a mini waffle cone with gold edible luster and press it in as the unicorn horn. Add rainbow sprinkles and edible stars.
Make it ahead: These cheesecake jars keep in the refrigerator for up to 3 days without the toppings. Add decorations just before serving.
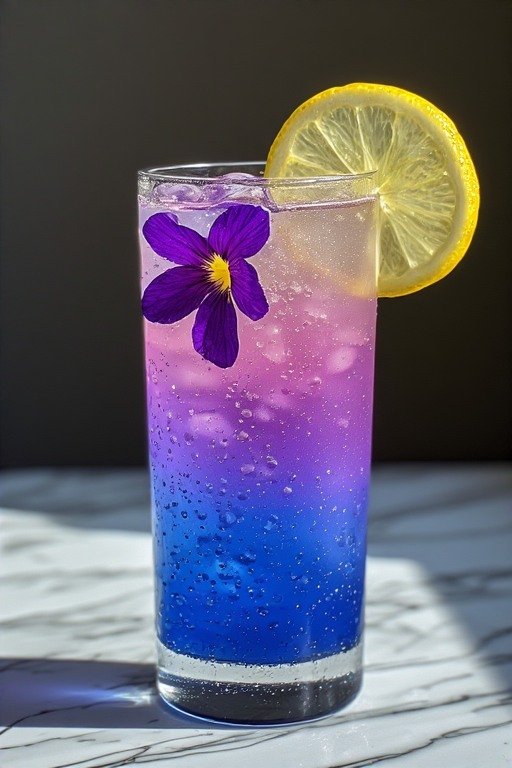
3. Butterfly Pea Flower Lemonade (Color-Changing Magic)
This is the most magical drink you will ever serve. Butterfly pea flower tea is a deep, vivid blue — but the moment you pour in lemon juice, it transforms before your eyes to bright purple and then violet. It’s chemistry as entertainment.
Ingredients
2 tablespoons dried butterfly pea flowers (available online and in health food stores)
2 cups hot water
3 tablespoons honey or simple syrup
Juice of 2 large lemons
Ice
Sparkling water
Lemon slices and edible flowers for garnish
How to Make It
Steep the dried butterfly pea flowers in 2 cups of hot water for 5 minutes. The water will turn an extraordinary deep blue. Strain out the flowers completely and let the tea cool.
Stir in honey or simple syrup while the tea is still warm so it dissolves properly.
Fill glasses with ice. Pour the blue butterfly pea tea over the ice until the glass is about two-thirds full.
Now the magic: Slowly pour the fresh lemon juice down the side of the glass. Watch as it hits the blue liquid and the color begins transforming from blue to purple to pink-violet right in front of you.
Top with a splash of sparkling water. Garnish with a slice of lemon and a pressed edible flower.
For parties: Set up a self-serve station with the blue tea in a pitcher, lemon juice in a small jug, and let guests pour their own lemon juice and watch the transformation happen in their own glass. It becomes the moment of the party.
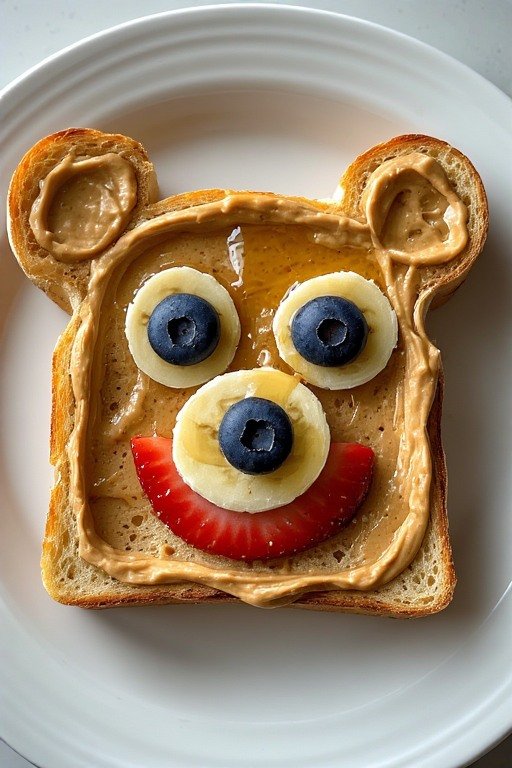
The easiest entry point into whimsical food. A simple banana and peanut butter toast transformed into an adorable teddy bear face that makes children genuinely excited to eat breakfast.
Ingredients
2 slices of thick bread, toasted golden
3 tablespoons peanut butter or almond butter
1 banana, sliced into rounds
Blueberries or dark chocolate chips (for eyes and nose)
A strawberry or raspberry (for the mouth)
Honey to drizzle
How to Make It
Toast the bread until golden and firm — thin bread won’t support the toppings well.
Spread a generous layer of peanut butter over the entire slice.
Build the bear: Place a large banana round in the center of the toast for the face. Add two smaller banana rounds at the top corners for the ears. Place two blueberries or chocolate chips as eyes, one in the center as a nose, and arrange a thin strawberry slice as a smile.
Drizzle a little honey over everything.
Make it seasonal: Swap the peanut butter for cream cheese and use sliced strawberries to make a pink bear for Valentine’s Day. Use orange curd and mandarin segments for a Halloween tiger version.
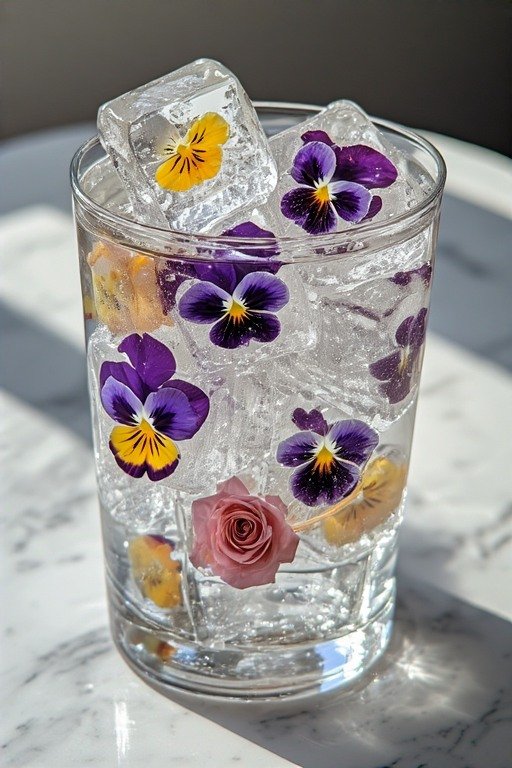
These are the ice cubes that transform a glass of water, lemonade, or cocktail into something that looks like a botanical illustration. Pressed edible flowers suspended in clear ice — beautiful, simple, and completely unforgettable.
What You Need
Edible flowers (pansies, violets, rose petals, borage, lavender — all work beautifully)
Filtered or distilled water (gives clearer ice than tap water)
Silicone ice cube molds — the larger the better for visual impact
How to Make It
Fill each mold cavity one-third full with water. Place one or two edible flowers face-down in the water. Freeze for 2 hours until the first layer is solid — this anchors the flower in position.
Once frozen, fill the rest of each cavity with water to the top. Freeze again overnight.
Pop out the cubes carefully and use immediately or store in a zip-lock bag in the freezer for up to two weeks.
Clear ice secret: Use boiled water that has been allowed to cool completely, or distilled water. This reduces the minerals that cause that cloudy white center in regular ice cubes — the flower shows through beautifully in clear ice.
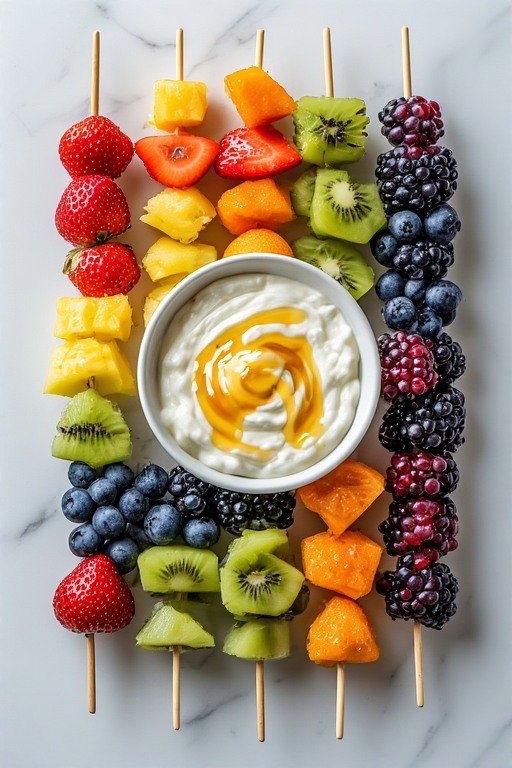
The most naturally whimsical food idea on this list — because the colors are real and nothing is artificial. A rainbow of fresh fruit on skewers arranged in order of the spectrum, served with a creamy honey yogurt dip.
Ingredients
For the skewers (make each color a section):
Red: strawberries and watermelon cubes
Orange: mandarin segments and cantaloupe
Yellow: pineapple cubes and mango
Green: green grapes and kiwi slices
Blue/Purple: blueberries and red grapes
Purple: blackberries
For the honey yogurt dip:
1 cup thick Greek yogurt
2 tablespoons honey
½ teaspoon vanilla extract
Pinch of cinnamon
How to Make It
Thread the fruit onto skewers in rainbow color order — red through to purple. Keep each color section 2 to 3 pieces, so the color blocks are clearly visible and the rainbow effect is obvious.
Arrange the finished skewers in a fan or arc shape on a white serving plate to emphasize the rainbow spread.
For the dip: whisk yogurt, honey, vanilla, and cinnamon together until smooth. Transfer to a small bowl and drizzle with a little extra honey.
Party presentation tip: Press the skewers into a halved watermelon to display them upright — they hold perfectly and the watermelon becomes part of the centerpiece.
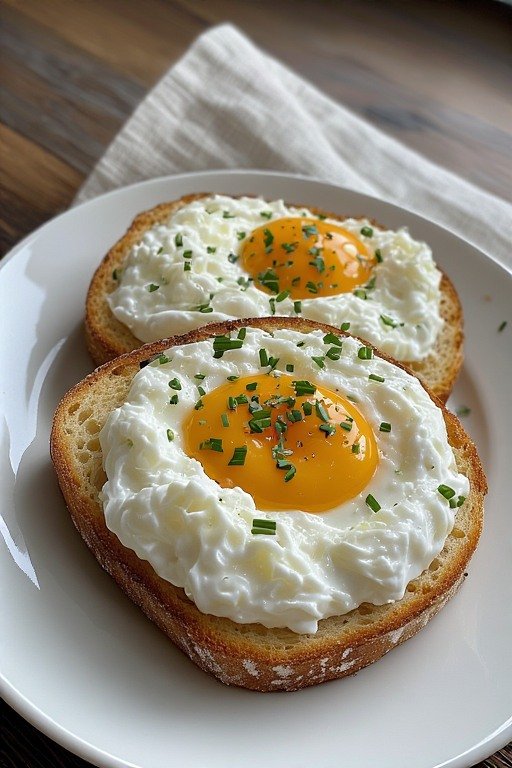
Cloud eggs are exactly what they sound like — the egg white whipped into a soft, billowing cloud, with the golden yolk nestled in the center like the sun. They went viral for a reason: they are ethereal, easy, and genuinely delicious.
Ingredients (per person)
2 eggs
2 tablespoons grated Parmesan
Salt and black pepper
Optional add-ins: crispy bacon bits, chives, a pinch of paprika
How to Make It
Preheat your oven to 230°C (450°F). Line a baking sheet with parchment paper.
Carefully separate the eggs, keeping the yolks whole and unbroken in their shells or small bowls. Place the whites in a clean, completely grease-free bowl — any trace of fat will prevent them from whipping.
Whip the egg whites with an electric mixer on high speed until stiff, glossy peaks form. This takes about 3 to 4 minutes. Fold in the Parmesan, salt, pepper, and any add-ins gently.
Spoon the whipped whites onto the parchment paper in two cloud shapes. Make a small nest or indent in the center of each cloud with the back of a spoon.
Bake for 3 minutes. Remove from the oven, carefully slide a yolk into each nest, and return to the oven for 3 more minutes until the yolk is just set but still runny.
Serve immediately on toast.
The critical rule: Serve within 2 minutes of removing from the oven. Cloud eggs deflate quickly as they cool — they are at their most beautiful and most delicious the moment they come out.
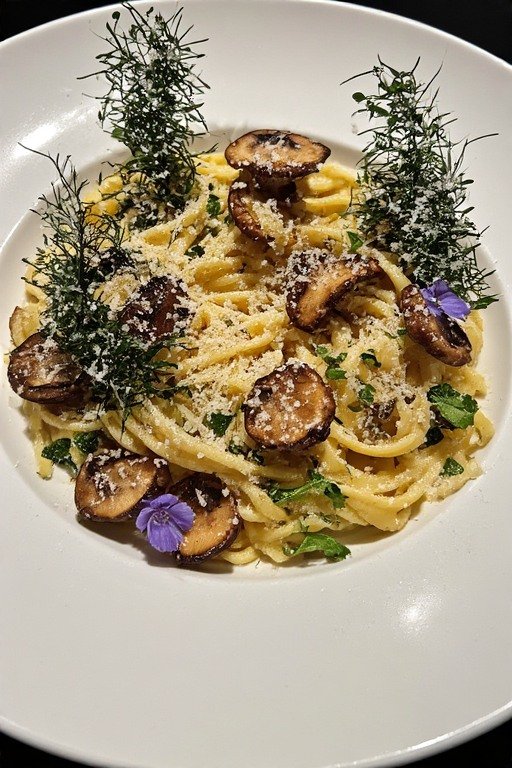
8. Mushroom Forest Pasta
Whimsy Level: ⭐⭐⭐ | Time: 25 minutes | Perfect For: Dinner parties, autumn menus, adults who love whimsy**
This is whimsical food for grown-ups. A deeply savory, earthy mushroom pasta presented to look like a forest floor — the pasta is the soil, the mushrooms are the trees, and edible herbs are the undergrowth.
Ingredients
300g tagliatelle or pappardelle (wide pasta works best for the forest floor look)
400g mixed mushrooms: shiitake, oyster, cremini, and king oyster mushrooms
4 garlic cloves, minced
3 tablespoons butter
1 tablespoon olive oil
100ml heavy cream
50ml pasta water
Fresh thyme and rosemary
Salt and black pepper
Parmesan, freshly grated
Micro herbs or baby watercress to garnish
Edible flowers (optional)
How to Make It
Boil pasta in well-salted water until just al dente. Reserve 100ml pasta water before draining.
In a wide pan, heat butter and olive oil together over high heat. Add the mushrooms in a single layer — don’t crowd them or they steam instead of sear. Cook without stirring for 2 full minutes until golden and caramelized on the bottom. Add garlic, thyme, and rosemary, and toss. Season generously.
Reduce heat to medium. Add cream and a splash of pasta water. Let it reduce for 2 minutes. Add the drained pasta and toss thoroughly until every strand is coated.
The presentation: Twist the pasta into a round nest shape in the center of a deep bowl. Arrange mushrooms upright around and through the pasta so they stand like trees. Scatter micro herbs at the base of the mushrooms. Grate Parmesan generously over everything. Add an edible flower or two.
The king oyster mushroom is your hero: Slice it vertically into thick planks and sear them flat — they caramelize beautifully and look like tree trunks when placed upright in the pasta. Worth seeking out for this specific recipe.
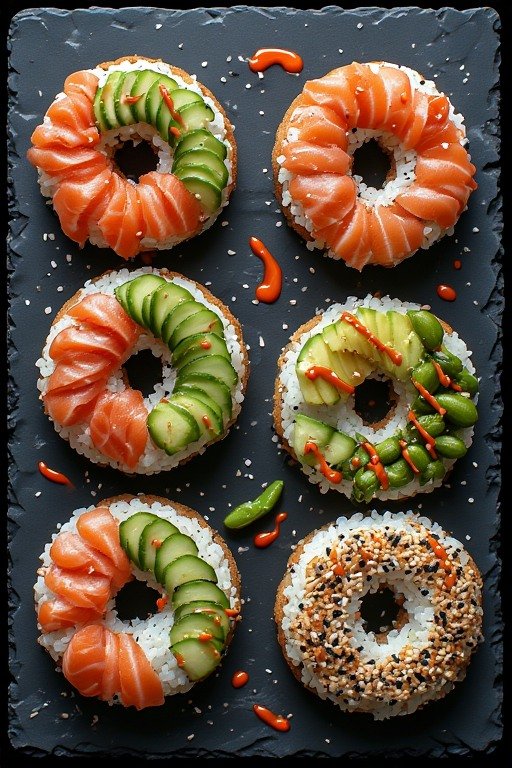
Sushi, reimagined. The same ingredients, pressed into a donut shape and decorated with color and precision — it’s the most fun sushi has ever looked, and it tastes exactly as good as it appears.
Ingredients
2 cups sushi rice, cooked and seasoned with rice vinegar, sugar, and salt
Let the sushi rice cool to room temperature — hot rice is too sticky and tears apart when unmolded.
Wet your hands with cold water. Press the sushi rice firmly into each cavity of a silicone donut mold. Press hard — the rice needs to hold its shape. Fill each cavity completely.
Refrigerate for 15 minutes to help the donuts set.
Turn the mold over onto a clean board and gently press from the back to release each rice donut. They should hold their shape perfectly.
Decorate in sections: Think of each donut like a clock face. Fill one quarter with thinly sliced avocado, one with salmon, one with cucumber, one with edamame. Drizzle sriracha mayo in zigzags, add sesame seeds, and finish with a drizzle of soy glaze or eel sauce.
Wet hands are non-negotiable: Sushi rice sticks to everything. Keep a bowl of cold water next to you and wet your hands before touching the rice every single time. Dry hands and sushi rice do not have a good relationship.
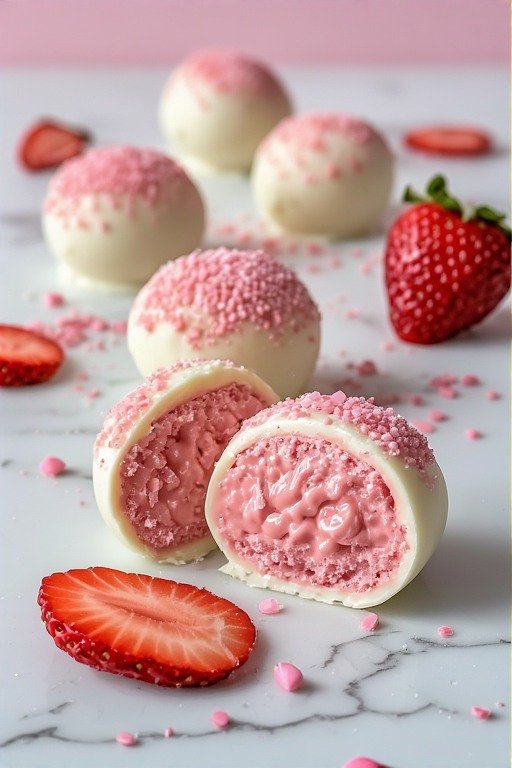
Creamy strawberry truffles with a secret: popping candy mixed into the filling. Every bite starts smooth and sweet, then suddenly fizzes and crackles on the tongue. The whimsy here isn’t visual — it’s experiential.
Ingredients
200g white chocolate, finely chopped
80ml heavy cream
2 tablespoons freeze-dried strawberry powder
Pink or red gel food coloring
1 packet strawberry popping candy
Extra white chocolate for coating
Strawberry powder and pink sprinkles for rolling
How to Make It
Heat the cream in a small saucepan until it just begins to simmer — do not boil. Remove from heat and pour over the chopped white chocolate. Let it sit 1 minute, then stir slowly from the center outward until completely smooth and glossy. This is your ganache.
Stir in the strawberry powder and a tiny drop of pink food coloring. Let it cool to room temperature, then refrigerate for 1 hour until firm enough to scoop.
Just before rolling, fold in the popping candy — do this at the last moment, as the candy begins to lose its fizziness if mixed in too early.
Scoop small portions and roll into balls between your palms. Dip in melted white chocolate, let the excess drip off, and roll in strawberry powder or pink sprinkles while the coating is still wet.
Popping candy timing is everything: Add it to the ganache just before rolling — not while the ganache is warm, and not while it’s being refrigerated. Moisture and heat kill the fizziness. Fold it in cold, right before you shape the truffles.
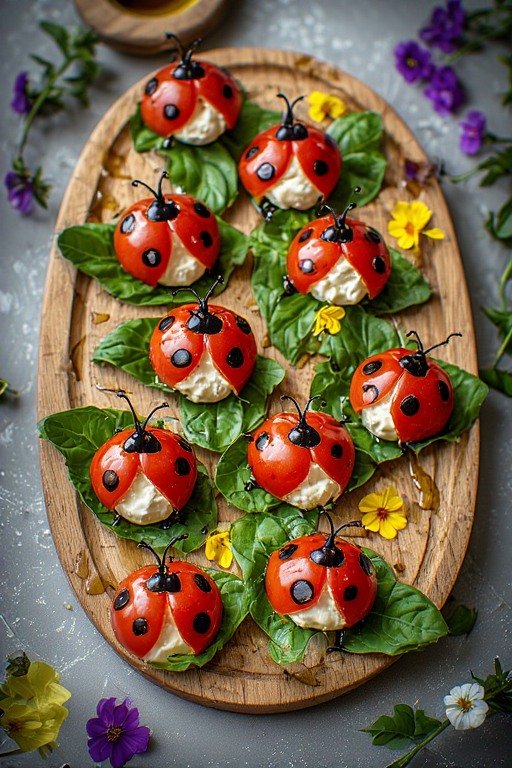
A classic Caprese salad, reimagined as the most adorable appetizer you’ve ever seen. Cherry tomatoes become ladybugs, mozzarella becomes their garden, and basil becomes their field. Zero cooking required.
Ingredients
16 cherry tomatoes
16 small fresh mozzarella balls (bocconcini)
Fresh basil leaves
Black olive, sliced (for spots and eyes)
Toothpicks
Olive oil and balsamic glaze to serve
Flaky salt
How to Make It
Slice each cherry tomato in half from top to bottom. Take the top half and make one small cut down the center — this creates the two “wings” of the ladybug that open slightly.
Place a bocconcini ball on a basil leaf on the serving board. Perch the tomato wings open on top of the mozzarella — the white cheese shows through the gap as the ladybug’s body.
Use tiny pieces of black olive pressed onto the tomato wings as spots. Add two tiny olive slivers at the front as antennae.
Drizzle the whole board with olive oil and balsamic glaze. Sprinkle with flaky salt.
The spot trick: Use a toothpick to press tiny pieces of olive onto the tomato skin as spots — fingers are too clumsy for the detail work. A toothpick gives you precision and keeps the design clean and intentional.
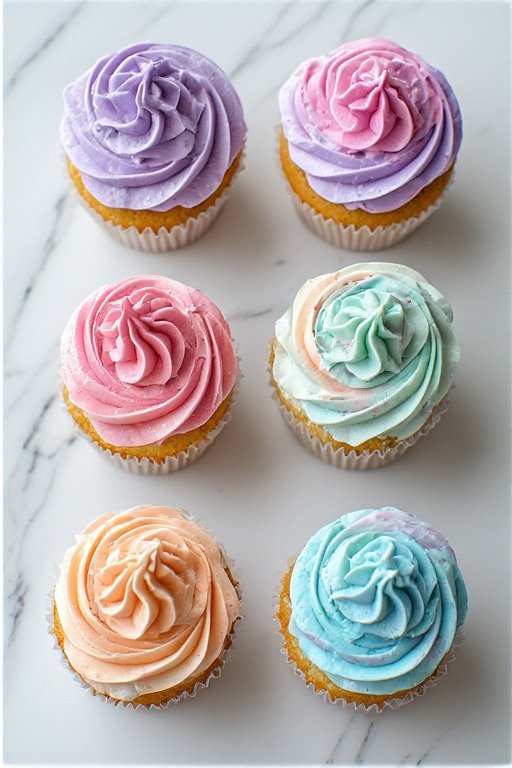
These cupcakes look like they were painted by a professional watercolor artist. The technique is surprisingly simple — gel food coloring applied to a palette knife and then spread into the buttercream creates the most beautiful, painterly effect.
Ingredients
For the cupcakes:
1.5 cups all-purpose flour
1.5 teaspoons baking powder
½ teaspoon salt
½ cup unsalted butter, softened
1 cup sugar
2 eggs
2 teaspoons vanilla extract
½ cup whole milk
For the watercolor buttercream:
1 cup unsalted butter, softened
3 cups powdered sugar
2 to 3 tablespoons heavy cream
1 teaspoon vanilla extract
Gel food coloring in 3 to 4 colors of your choice
How to Make It
Cupcakes: Cream butter and sugar until pale and fluffy, about 4 minutes. Add eggs one at a time, beating well after each. Mix in vanilla. Alternate adding flour mixture and milk, beginning and ending with flour. Fill cupcake liners two-thirds full. Bake at 175°C (350°F) for 18 to 20 minutes. Cool completely before frosting.
Buttercream: Beat butter until very pale and fluffy, about 5 minutes. Add powdered sugar gradually, then cream and vanilla. Beat on high for 3 minutes until light.
The watercolor technique: Apply a base layer of white buttercream to each cupcake with an offset spatula. Dip a clean palette knife into one gel color and streak it across the frosting. Wipe the knife, pick up another color, streak it nearby. Use a clean knife to blend the edges where colors meet — just slightly, not fully mixed. The goal is visible color movement, like a watercolor wash.
Gel coloring only: Liquid food coloring makes the buttercream too soft and the colors too pale. Gel food coloring is concentrated and keeps the buttercream stable. Use the tiniest amount — you can always add more.
14. Starry Night Gelatin Dessert
Whimsy Level: ⭐⭐⭐⭐⭐ | Time: 20 minutes + overnight setting | Perfect For: Dinner parties, special occasions, art lovers**
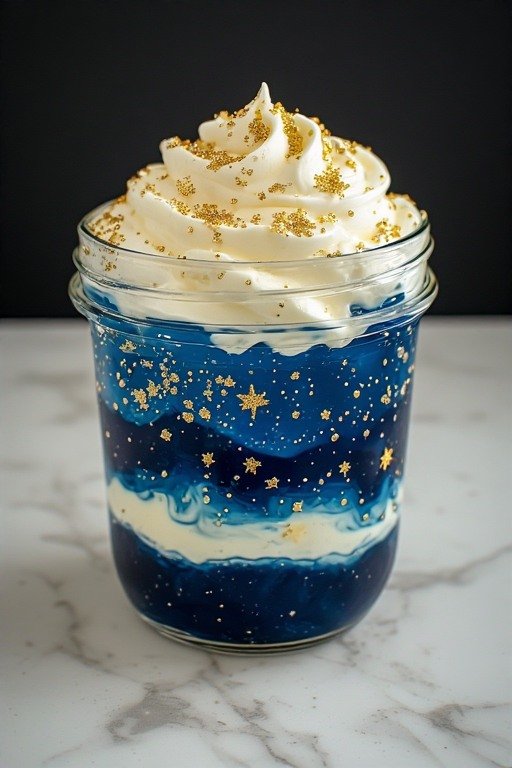
Inspired by Van Gogh’s painting, this layered gelatin dessert creates deep blue sky with gold swirls, suspended stars made from cream cheese gelatin, and a dark horizon at the base. It is, without question, the most show-stopping dessert on this list.
Ingredients
For the night sky layer:
3 cups blue fruit gelatin (or clear gelatin colored with blue and purple food coloring)
Edible gold glitter or gold luster dust
Edible star sprinkles
For the star clouds:
1 cup clear gelatin
3 tablespoons cream cheese, softened
1 tablespoon sugar
White and yellow food coloring
For the horizon:
1 cup dark chocolate gelatin or very dark navy-colored clear gelatin
How to Make It
Layer 1 — The horizon: Prepare the dark gelatin and pour a 1cm layer into the base of a clear serving dish or individual glasses. Refrigerate until fully set, about 1 hour.
Layer 2 — The night sky: Prepare the blue gelatin and let it cool until just starting to thicken but not yet set. Stir in edible gold glitter. Pour carefully over the set dark layer. Scatter edible star sprinkles into the blue layer. Refrigerate for 2 hours.
Star clouds: Beat cream cheese and sugar until smooth. Whisk into the clear gelatin while still warm. Color portions white and pale yellow. Drizzle these gently over the blue layer in swirling patterns using a spoon or squeeze bottle. The cream cheese gelatin is denser and will settle into the blue layer in cloud-like swirls.
Refrigerate overnight until fully set.
Serve in individual glasses: The layered effect is most dramatic when viewed from the side through clear glass. Wide-mouth glasses or glass jars with straight sides show every layer perfectly — a deep bowl hides the stratification.
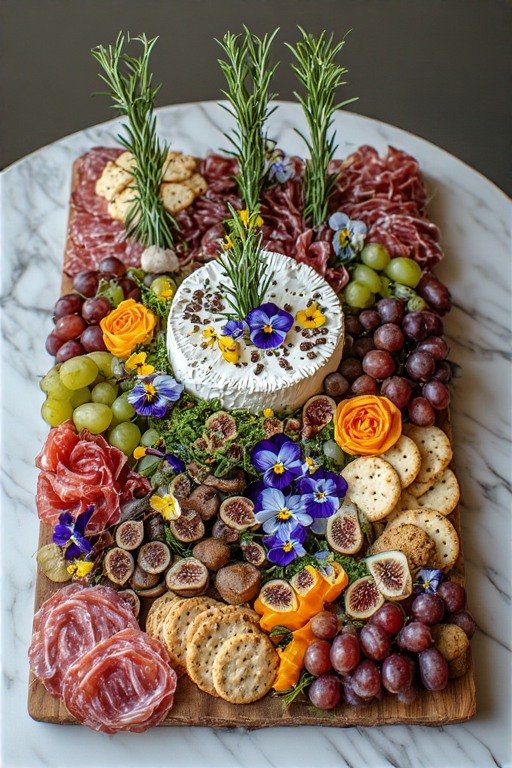
A traditional charcuterie board reimagined as a miniature fairy garden. Edible flowers become wildflowers, soft cheeses become mossy rocks, crackers become stepping stones, and herbs become towering trees. The same food, presented as a landscape.
Cured meats: prosciutto, salami (folded into roses)
Crackers and breadsticks
Fresh and dried fruits: grapes, figs, strawberries, dried apricots
Nuts: almonds, walnuts, pistachios
Fresh herbs: rosemary sprigs, thyme, fresh mint
Edible flowers: pansies, violas, nasturtiums
Honeycomb piece
Small mushrooms (raw or marinated)
Small decorative mushroom picks (optional)
How to Build It
Start with the anchors: Place the whole brie wheel slightly off-center. Nest the soft goat cheese in a small bowl or shape it into a mound and press edible flowers into the surface.
Build the landscape: Arrange crackers in a winding “path” across the board. Stack aged cheddar in irregular shapes like small rocky formations.
Add the garden elements: Tuck rosemary sprigs upright between cheeses so they stand like miniature trees. Press edible flowers across the board wherever there are empty spaces — they become the wildflowers of the garden. Lay mushrooms at the base of the cheese “rocks.”
Fill with abundance: Scatter grapes in clusters, weave prosciutto in flowing ribbons, fold salami into roses and place them at intervals. Place the honeycomb in a corner as if it’s been discovered there.
Final touch: Add mushroom picks for the fairy garden feeling, and press a few more edible flowers right at the end — wherever the board feels sparse.
The principle of abundance: A charcuterie board that looks whimsical and beautiful is always slightly overfilled. Every gap should have something in it — a nut, a grape, a flower. Negative space on a board looks like an oversight, not a design choice.
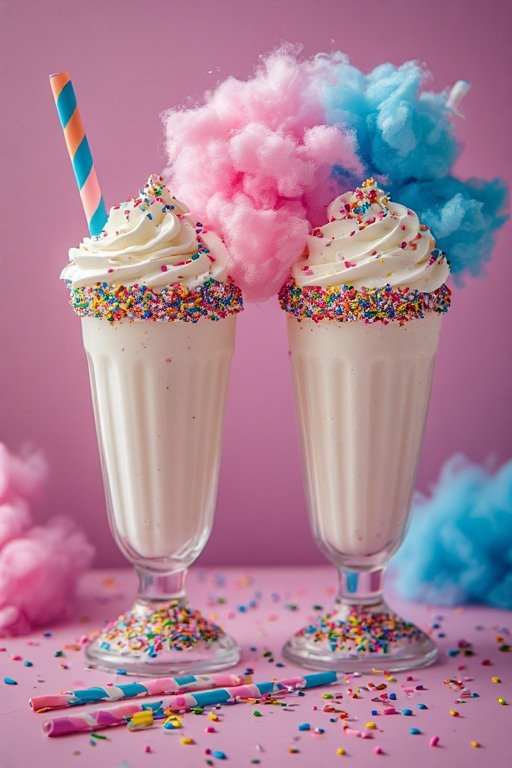
A thick, creamy vanilla milkshake topped with a cloud of cotton candy that slowly dissolves and flavors the drink as you sip. It’s dramatic, delicious, and disappears in the most magical way.
Ingredients
3 large scoops vanilla ice cream
½ cup whole milk
1 teaspoon vanilla extract
Pink and blue cotton candy (store-bought is perfectly fine)
Whipped cream
Sprinkles and edible glitter
Colored sugar for the rim
How to Make It
Rim the glass: dip the edge in a thin layer of corn syrup or water, then into colored sugar or fine sprinkles. Set aside.
Blend the vanilla ice cream, milk, and vanilla extract until thick and smooth. The milkshake should be thick enough to eat with a spoon — if it’s too thin, add more ice cream.
Pour the milkshake into the rimmed glass. Top generously with whipped cream, pulling it up into a tall peak.
The cotton candy moment: Place a large cloud of cotton candy on top of the whipped cream right before serving — not in advance, as it begins dissolving immediately with any moisture. Add a scatter of sprinkles and edible glitter over the cotton candy.
Serve immediately with a wide straw and watch the cotton candy slowly melt into the drink.
Timing is everything: Cotton candy dissolves on contact with moisture. This milkshake must be assembled and served immediately — it cannot be prepared ahead. The drama of the dissolving cotton candy is the entire point of the presentation.
The salad that doesn’t look like a salad. An arrangement of greens, vegetables, and garnishes that together create the impression of a miniature forest — complete with edible flowers, mushrooms, herb “trees,” and seed “pebbles.”
Dress the mixed greens lightly and lay them as the forest floor base in a wide, shallow bowl.
Building the forest: Stand the roasted broccoli florets upright through the greens so they look like trees. Place mushrooms around the base of the broccoli. Tuck cucumber pieces in like mossy stones.
Stand herb sprigs upright between the broccoli trees. Scatter seeds generously over the entire surface as the forest floor texture.
Arrange radish slices in overlapping circles to suggest fallen leaves. Add edible flowers wherever they fit naturally — they become wildflowers growing between the trees.
Shave Parmesan into thin, irregular strips and lay them across the top as fallen bark.
A final dusting of edible gold, if using, catches the light and makes the whole bowl glow.
Serve immediately: This salad loses its architectural structure quickly once dressed. Dress and arrange right before serving and bring it to the table as a centerpiece before anyone serves themselves — the full forest effect is most impressive untouched.
5 Rules for Making Any Food Look Whimsical
You don’t need a specific recipe to create whimsical food. You need the right principles applied to whatever you’re already making.
Rule 1 — Color is the first ingredient. A dish with three or more visible distinct colors reads as intentional and beautiful. Monotone food, however delicious, rarely photographs or presents as whimsical.
Rule 2 — Height creates drama. Flat food is ordinary. Food with vertical elements — upright mushrooms, stacked layers, tall garnishes — creates the impression of a scene rather than just a plate.
Rule 3 — Edible flowers are the ultimate shortcut. A single pressed pansy on a plain white plate immediately suggests intention and artistry. Keep dried or fresh edible flowers on hand and use them liberally.
Rule 4 — Negative space is the enemy. Whimsical food is abundant. Every gap on a board, bowl, or plate should have something in it — a nut, a herb sprig, a sprinkle. Sparse presentation looks unfinished, not minimal.
Rule 5 — Photograph before you eat. The whimsy lives in that first untouched moment. The cotton candy before it dissolves, the cloud egg before it deflates, the smoothie bowl before the first spoon breaks the pattern. Set the food down, take the photo, then eat.
Frequently Asked Questions
What does whimsical food mean exactly? Whimsical food refers to any dish where presentation, color, and creativity elevate a recipe beyond its functional purpose. It’s food that creates a feeling — wonder, delight, surprise — alongside its flavor. The term covers everything from intricately decorated cakes to color-changing drinks.
Do I need professional equipment to make whimsical food? Not at all. Most whimsical food ideas on this list require only standard kitchen equipment — a blender, a non-stick pan, standard baking trays, and a silicone mold or two. The investment is in ingredients like gel food coloring, edible flowers, and edible glitter — none of which are expensive.
Where can I find edible flowers? Edible flowers are increasingly available at farmers markets, specialty grocery stores, and online. Always confirm they are labeled specifically as edible — decorative flowers from a florist may have been treated with pesticides and are not safe to eat.
Can I make whimsical food ahead for a party? Many of these recipes prepare beautifully in advance. The unicorn cheesecake jars, starry night gelatin, hedgehog bread rolls, and fairy garden board all do well made ahead. Exceptions include the cloud eggs, cotton candy milkshakes, and mermaid smoothie bowl — serve those immediately.
Is whimsical food only for kids? Absolutely not. The mushroom forest pasta, enchanted forest salad, fairy garden charcuterie board, and starry night gelatin are all distinctly adult in flavor and concept. Whimsy in food is about evoking wonder — and adults need that just as much as children do.
Which of these is easiest for a complete beginner? Start with the Teddy Bear Toast, Rainbow Fruit Skewers, Edible Flower Ice Cubes, or Ladybug Caprese Bites. All four require minimal technique, no baking, and produce results that look impressive immediately.
The Bottom Line
Whimsical food isn’t a trend. It’s a philosophy: the belief that a meal can be more than fuel, that a plate can tell a story, and that the act of cooking can be just as joyful as the act of eating.
Every recipe on this list began with a simple idea — pancakes, pasta, salad, gelatin — and became something extraordinary through color, composition, and creativity.
You don’t need to be a professional chef to cook whimsically. You just need to be willing to see your kitchen as a studio, your ingredients as a palette, and your plate as a blank canvas.
Start with one recipe. Make it your own. And don’t forget to take the photo first.
Tried any of these whimsical food ideas? Share your creation in the comments below — we’d love to see what you made. And if you put your own spin on any of these recipes, tell us about it!
You Might Also Like:
15 Aesthetic Food Ideas That Are Perfect for Your Instagram Feed
How to Make Edible Flower Arrangements for Cakes and Desserts
12 Stunning Charcuterie Board Ideas for Every Occasion
The Beginner’s Guide to Gel Food Coloring (And Why It Changes Everything)
10 No-Bake Desserts That Look Like They Took Hours